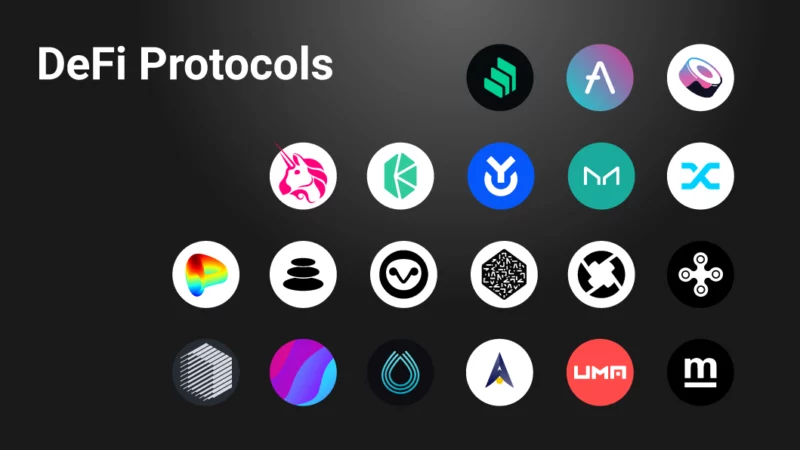
Decentralized Finance (DeFi) is transforming money management, letting people lend, borrow, or trade without banks. Ever wondered how to build your own DeFi protocol? This beginner-friendly guide walks you through creating a simple lending protocol on Ethereum, using Solidity for smart contracts and React for the front-end. Whether you’re a developer or a curious learner, let’s dive into the world of DeFi!

What Is a DeFi Protocol?
A DeFi protocol is a set of smart contracts that enables financial services on a blockchain, like lending, borrowing, or swapping tokens. Think of it as a bank run by code, not people. Our example will be a lending protocol where users deposit ETH to earn interest or borrow against collateral.
DeFi protocols are:
- Decentralized: No central authority controls the funds.
- Transparent: All transactions are public on the blockchain.
- Permissionless: Anyone with a wallet can participate.
For developers, building a DeFi protocol is a great way to learn blockchain and create real-world applications.
Why Build a DeFi Protocol?
DeFi is booming, with billions locked in protocols like Aave and Compound. Building your own protocol lets you:
- Innovate: Create new financial tools for users worldwide.
- Learn Blockchain: Master smart contracts and decentralized systems.
- Contribute: Support the open finance movement.
Our lending protocol will teach you core DeFi concepts like liquidity pools and collateralized loans.

Tools You’ll Need
To build the protocol, gather these tools:
- Node.js: For JavaScript execution. Download from nodejs.org.
- Hardhat: For smart contract development. Install via
npm install --save-dev hardhat. - Ethers.js: For Ethereum interactions. Install with
npm install ethers. - MetaMask: For wallet integration. Get it at metamask.io.
- React: For the front-end. We’ll set this up later.
With these, you’re ready to build a DeFi lending platform.
Step-by-Step: Building a DeFi Lending Protocol
We’ll create a lending protocol where users deposit ETH to earn interest and borrow ETH by locking collateral. The smart contract will manage funds, and a React app will provide a user interface. Let’s go!
Step 1: Set Up the Hardhat Project
Create a project directory and initialize Hardhat:
mkdir defi-lending
cd defi-lending
npx hardhat
npm install @openzeppelin/contracts
Choose the JavaScript project option and install OpenZeppelin for secure contract utilities.
Step 2: Write the Lending Smart Contract
Create a file named contracts/LendingPool.sol with the following code:
// SPDX-License-Identifier: MIT
pragma solidity ^0.8.0;

import "@openzeppelin/contracts/token/ERC20/IERC20.sol";
import "@openzeppelin/contracts/security/ReentrancyGuard.sol";

contract LendingPool is ReentrancyGuard {
    mapping(address => uint256) public deposits;
    mapping(address => uint256) public borrowings;
    uint256 public totalDeposits;
    uint256 public interestRate = 5; // 5% annual interest (simplified)
    uint256 public collateralRatio = 150; // 150% collateral required

    event Deposited(address indexed user, uint256 amount);
    event Borrowed(address indexed user, uint256 amount);
    event Repaid(address indexed user, uint256 amount);
    event Withdrawn(address indexed user, uint256 amount);

    function deposit() external payable nonReentrant {
        require(msg.value > 0, "Deposit amount must be greater than 0");
        deposits[msg.sender] += msg.value;
        totalDeposits += msg.value;
        emit Deposited(msg.sender, msg.value);
    }

    function borrow(uint256 amount) external nonReentrant {
        require(amount > 0, "Borrow amount must be greater than 0");
        uint256 requiredCollateral = (amount * collateralRatio) / 100;
        require(deposits[msg.sender] >= requiredCollateral, "Insufficient collateral");
        require(totalDeposits >= amount, "Insufficient liquidity");
        borrowings[msg.sender] += amount;
        totalDeposits -= amount;
        (bool success, ) = msg.sender.call{value: amount}("");
        require(success, "Transfer failed");
        emit Borrowed(msg.sender, amount);
    }

    function repay() external payable nonReentrant {
        require(msg.value > 0, "Repay amount must be greater than 0");
        require(borrowings[msg.sender] >= msg.value, "Overpayment");
        borrowings[msg.sender] -= msg.value;
        totalDeposits += msg.value;
        emit Repaid(msg.sender, msg.value);
    }

    function withdraw(uint256 amount) external nonReentrant {
        require(amount > 0, "Withdraw amount must be greater than 0");
        require(deposits[msg.sender] >= amount, "Insufficient balance");
        uint256 requiredCollateral = (borrowings[msg.sender] * collateralRatio) / 100;
        require(deposits[msg.sender] - amount >= requiredCollateral, "Collateral too low");
        deposits[msg.sender] -= amount;
        totalDeposits -= amount;
        (bool success, ) = msg.sender.call{value: amount}("");
        require(success, "Transfer failed");
        emit Withdrawn(msg.sender, amount);
    }

    function getBalance() external view returns (uint256) {
        return deposits[msg.sender];
    }
}
This contract allows users to:
- Deposit ETH to earn interest (simplified as a fixed 5%).
- Borrow ETH by locking 150% collateral.
- Repay loans or withdraw deposits.
The ReentrancyGuard prevents attacks where hackers try to drain funds.

Step 3: Deploy the Contract
Create a deployment script in scripts/deploy.js:
const hre = require("hardhat");

async function main() {
    const LendingPool = await hre.ethers.getContractFactory("LendingPool");
    const lendingPool = await LendingPool.deploy();
    await lendingPool.deployed();
    console.log("LendingPool deployed to:", lendingPool.address);
}

main().catch((error) => {
    console.error(error);
    process.exitCode = 1);
});
Configure hardhat.config.js for Sepolia (get an API key from Infura or Alchemy):
require("@nomicfoundation/hardhat-toolbox");

module.exports = {
    solidity: "0.8.0",
    networks: {
        sepolia: {
            url: "https://sepolia.infura.io/v3/YOUR_API_KEY",
            accounts: ["YOUR_PRIVATE_KEY"]
        }
    }
};
Deploy with npx hardhat run scripts/deploy.js --network sepolia. Note the contract address.
Step 4: Build a React Front-End
Create a React app for users to interact with the protocol:
npx create-react-app lending-dapp
cd lending-dapp
npm install ethers
Replace src/App.js with:
import { useState } from 'react';
import { ethers } from 'ethers';
import './App.css';

const contractAddress = 'YOUR_CONTRACT_ADDRESS';
const contractABI = [/* YOUR_CONTRACT_ABI */]; // From Hardhat artifacts

function App() {
    const [account, setAccount] = useState(null);
    const [amount, setAmount] = useState('');
    const [balance, setBalance] = useState('0');

    const connectWallet = async () => {
        if (window.ethereum) {
            const provider = new ethers.BrowserProvider(window.ethereum);
            const accounts = await provider.send('eth_requestAccounts', []);
            setAccount(accounts[0]);
            const contract = new ethers.Contract(contractAddress, contractABI, provider);
            const balance = await contract.getBalance({ from: accounts[0] });
            setBalance(ethers.formatEther(balance));
        } else {
            alert('Install MetaMask!');
        }
    };

    const deposit = async () => {
        if (!account || !amount) return;
        const provider = new ethers.BrowserProvider(window.ethereum);
        const signer = await provider.getSigner();
        const contract = new ethers.Contract(contractAddress, contractABI, signer);
        await contract.deposit({ value: ethers.parseEther(amount) });
        alert('Deposit successful!');
        const balance = await contract.getBalance();
        setBalance(ethers.formatEther(balance));
    };

    const borrow = async () => {
        if (!account || !amount) return;
        const provider = new ethers.BrowserProvider(window.ethereum);
        const signer = await provider.getSigner();
        const contract = new ethers.Contract(contractAddress, contractABI, signer);
        await contract.borrow(ethers.parseEther(amount));
        alert('Borrow successful!');
        const balance = await contract.getBalance();
        setBalance(ethers.formatEther(balance));
    };

    const repay = async () => {
        if (!account || !amount) return;
        const provider = new ethers.BrowserProvider(window.ethereum);
        const signer = await provider.getSigner();
        const contract = new ethers.Contract(contractAddress, contractABI, signer);
        await contract.repay({ value: ethers.parseEther(amount) });
        alert('Repay successful!');
        const balance = await contract.getBalance();
        setBalance(ethers.formatEther(balance));
    };

    const withdraw = async () => {
        if (!account || !amount) return;
        const provider = new ethers.BrowserProvider(window.ethereum);
        const signer = await provider.getSigner();
        const contract = new ethers.Contract(contractAddress, contractABI, signer);
        await contract.withdraw(ethers.parseEther(amount));
        alert('Withdraw successful!');
        const balance = await contract.getBalance();
        setBalance(ethers.formatEther(balance));
    };

    return (
        DeFi Lending DApp
            {!account ? (
                Connect Wallet
            ) : (
                Connected: {account}Balance: {balance} ETH setAmount(e.target.value)}
                    />
                    DepositBorrowRepayWithdraw
            )}

    );
}

export default App;
Add styling in src/App.css:
.App {
    text-align: center;
    padding: 50px;
    font-family: Arial, sans-serif;
}

input {
    padding: 10px;
    margin: 10px;
    width: 200px;
}

button {
    padding: 10px 20px;
    margin: 10px;
    cursor: pointer;
    background-color: #0288d1;
    color: white;
    border: none;
    border-radius: 5px;
}

button:hover {
    background-color: #0277bd;
}
Run with npm start. Connect MetaMask to Sepolia, deposit test ETH (get some from sepoliafaucet.com), and try borrowing, repaying, or withdrawing.

Step 5: Test the Protocol
Test the DApp with multiple MetaMask accounts:
- Deposit ETH and check your balance.
- Borrow ETH with sufficient collateral (150% of the loan).
- Repay the loan and withdraw your deposit.
- Try invalid actions (e.g., borrowing without collateral) to ensure they fail.
Monitor events using Alchemy or Hardhat’s console.
Benefits of Building a DeFi Protocol
Creating a DeFi protocol offers:
- Financial Inclusion: Provide services to anyone with internet access.
- Innovation: Experiment with new financial models like yield farming.
- Community Impact: Contribute to a decentralized economy.
DeFi protocols empower users and developers alike.
Challenges of Building DeFi Protocols
DeFi development has hurdles:
- Security Risks: Bugs in smart contracts can lead to hacks, like the $600M Poly Network exploit.
- Gas Costs: High Ethereum fees can deter users.
- Complexity: Balancing interest rates and collateral ratios requires careful design.
Mitigate these with audits, layer-2 solutions, and user-friendly interfaces.
Tips for Developers Building DeFi Protocols
To create a successful DeFi protocol:
- Audit Contracts: Use MythX or Slither to check for vulnerabilities.
- Optimize Gas: Minimize storage operations to reduce transaction costs.
- Test Extensively: Simulate attacks with Hardhat on testnets.
- Learn from Leaders: Study protocols like Aave or Compound.
These practices ensure your protocol is secure and efficient.
Resources for Learning More
Deepen your DeFi knowledge with these resources:
- Ethereum Docs: DeFi development at ethereum.org.
- OpenZeppelin: Secure contract templates at docs.openzeppelin.com.
- DeFi Communities: Join discussions on Ethereum Stack Exchange or DeFi forums.
Stay curious to master DeFi development.
Conclusion
Building a DeFi protocol is an exciting way to create financial tools that empower users worldwide. By developing a lending protocol with Solidity and React, you’ve learned how to manage deposits, loans, and collateral on Ethereum. Keep exploring advanced DeFi features like automated market makers or yield farming, and share your DeFi ideas in the comments below!


