

Running your own blockchain node is a great way to engage with decentralized networks like Ethereum, contribute to their security, and gain a deeper understanding of how blockchains work. A node is a computer that connects to a blockchain network, validates transactions, and stores a copy of the blockchain’s data. This beginner-friendly guide will walk you through the process of setting up an Ethereum node, with clear steps that anyone can follow, even without technical expertise.
What Is a Blockchain Node?
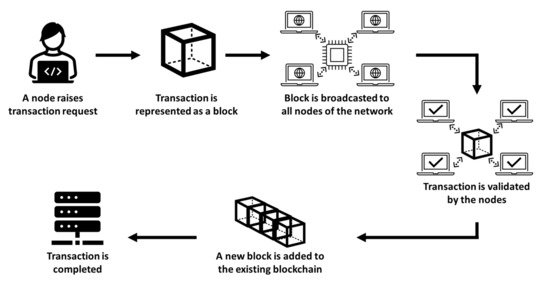
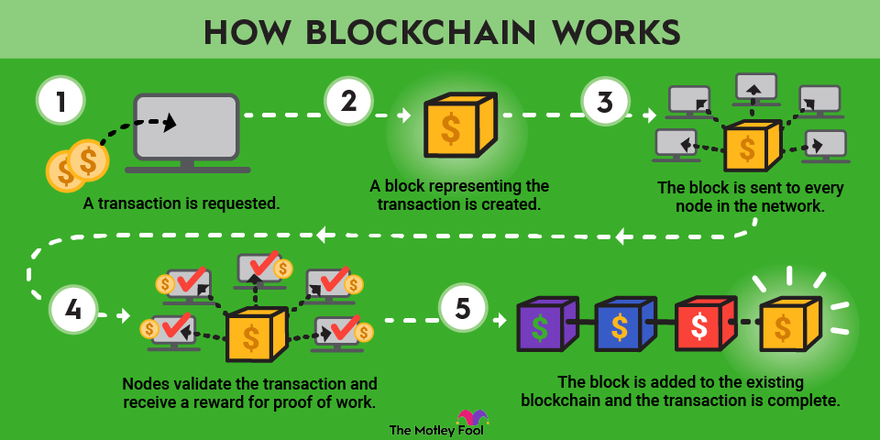
A blockchain node is a device running software that connects to a blockchain network. Nodes maintain the network by validating and relaying transactions, storing the blockchain’s history, and ensuring consensus. By running a node, you help keep the network decentralized and secure while gaining direct access to blockchain data without relying on third-party services.
Why Run Your Own Node?
Setting up a blockchain node offers several benefits:
- Privacy: Access blockchain data directly without intermediaries.
- Decentralization: Support the network’s security and resilience.
- Learning: Gain hands-on experience with blockchain technology.
- dApp Development: Use your node to test and deploy decentralized applications.
While running a node requires some setup, it’s an exciting way to dive into the blockchain ecosystem.
Requirements for Running an Ethereum Node
Before you start, ensure you have the following:
- Hardware: A computer with at least 8 GB RAM, a multi-core CPU, and 500 GB of SSD storage (1 TB recommended for a full node).
- Internet: A stable, high-speed connection with no strict data caps.
- Operating System: Windows, macOS, or Linux (Ubuntu is popular).
- Software: Ethereum client software like Geth or Besu.

Step-by-Step Guide to Setting Up an Ethereum Node
We’ll use Geth, a popular Ethereum client, to set up a node on the Ethereum mainnet. Follow these steps to get started.
Step 1: Install Geth
Geth (Go Ethereum) is a command-line tool for running an Ethereum node. Download and install it:
- Visit the official Geth website (geth.ethereum.org) and download the version for your operating system.
- For Ubuntu, open a terminal and run:sudo apt-get install -y software-properties-common sudo add-apt-repository -y ppa:ethereum/ethereum sudo apt-get update sudo apt-get install -y geth
- For Windows or macOS, follow the installation instructions on the Geth website.

Step 2: Initialize the Node
Before running your node, initialize it with the Ethereum blockchain’s genesis file:
- Create a directory for your node’s data (e.g.,
~/eth-node). - In your terminal, run:geth –datadir ~/eth-node init
- This sets up the initial files needed for your node.
Step 3: Start Syncing the Blockchain
Syncing downloads the entire Ethereum blockchain to your computer. Run the following command to start your node in full sync mode:
geth --datadir ~/eth-node --http --http.api eth,net,web3
The --http flag enables an HTTP-RPC server, allowing you to interact with your node (e.g., via MetaMask). Syncing can take several days for a full node, depending on your hardware and internet speed.
Tip: For faster setup, consider running a light node by adding the --syncmode light flag, which requires less storage but offers limited functionality.
Step 4: Verify Your Node
Once syncing is complete, verify that your node is running correctly:
- Open a new terminal and connect to your node’s console:geth attach ~/eth-node/geth.ipc
- In the Geth JavaScript console, type
eth.blockNumberto check the latest block number. If it’s increasing, your node is syncing properly.
Step 5: Interact with Your Node
Your node can now interact with the Ethereum network. For example:
- Connect MetaMask to your node by setting a custom RPC URL (e.g.,
http://localhost:8545). - Use your node to query blockchain data or deploy smart contracts via tools like Remix IDE.
Tips for Maintaining Your Node
Running a node requires ongoing maintenance. Here are some tips:
- Monitor Storage: The blockchain grows over time, so ensure you have enough disk space.
- Keep Software Updated: Regularly update Geth to the latest version for security and performance.
- Secure Your Node: Use a firewall to restrict access to your node’s RPC port (default: 8545).
- Backup Data: Periodically back up your node’s data directory to avoid re-syncing if something goes wrong.
Challenges and Solutions
You may encounter issues while running a node. Here are common challenges and how to address them:
- Slow Syncing: Upgrade your internet or hardware, or switch to light sync mode.
- High Disk Usage: Use an external SSD or prune old data if supported by your client.
- Connection Errors: Check your firewall settings and ensure ports (e.g., 30303 for Geth) are open.

Next Steps After Setting Up Your Node
Once your node is running, explore these opportunities:
- Develop dApps: Use your node to test and deploy smart contracts.
- Join a Testnet: Experiment with test networks like Sepolia for free.
- Contribute to Ethereum: Participate in community discussions or report bugs.
Check out resources like Ethereum’s official node documentation for more advanced configurations.
Conclusion
Setting up your own blockchain node is a rewarding way to engage with decentralized technology. By following these steps, you can run an Ethereum node, contribute to the network, and unlock new possibilities for learning and development. Start small, be patient during the syncing process, and keep exploring the exciting world of blockchain!


